
Automatic user provisioning with Kevra Identity: SCIM inbound and outbound
SCIM (System for Cross-domain Identity Management) is the open standard that keeps user accounts in sync between systems. Your identity provider knows who is in the company; every application downstream needs a current copy of that knowledge. SCIM is how the copy stays current: a small REST API that creates, updates and deactivates users automatically, so the systems agree without anyone copying data between them.
Without it, someone does the syncing by hand. New hires wait for accounts. User lists get exported to CSV and imported somewhere else, on a schedule if you are lucky. And when people leave, their accounts tend to stay behind, which is exactly how orphaned access happens. With provisioning in place, joiners appear on day one and leavers are deactivated the moment your identity provider says so.
Kevra Identity supports SCIM 2.0 in both directions. Inbound: Okta or Microsoft Entra ID provisions users and groups into your realm. Outbound: your realm pushes them onward to your own application over the same standard. It is built on open source, so there is no lock-in at either end. This guide walks through both.
Inbound: connect your identity provider
Every realm in Kevra Identity exposes its own SCIM 2.0 endpoint:
https://<your-instance>/realms/<realm>/scim/v2Authentication is a bearer token issued per realm. When SCIM is enabled on your realm you receive the endpoint URL and the token; that pair is all an identity provider needs. Configuration is per realm, so each tenant keeps its own token and its own mappings, whether you run a dedicated instance or share one.
Microsoft Entra ID
- In the Entra admin center, go to Enterprise applications > New application > Create your own application and pick the non-gallery option.
- In the new app, open Provisioning and choose Automatic. Set Tenant URL to your realm's SCIM endpoint and paste the token into Secret Token. The token goes in bare, without any
Bearerprefix; Entra adds that itself. - Run Test Connection. It should pass right away; if it fails, the usual culprit is a
Bearerprefix pasted into the token field. - Review the attribute mappings. The defaults work: users are matched by
userNamefromuserPrincipalName, groups bydisplayName. You can adjust any mapping, for example to sourceexternalIdfrom a different directory attribute.
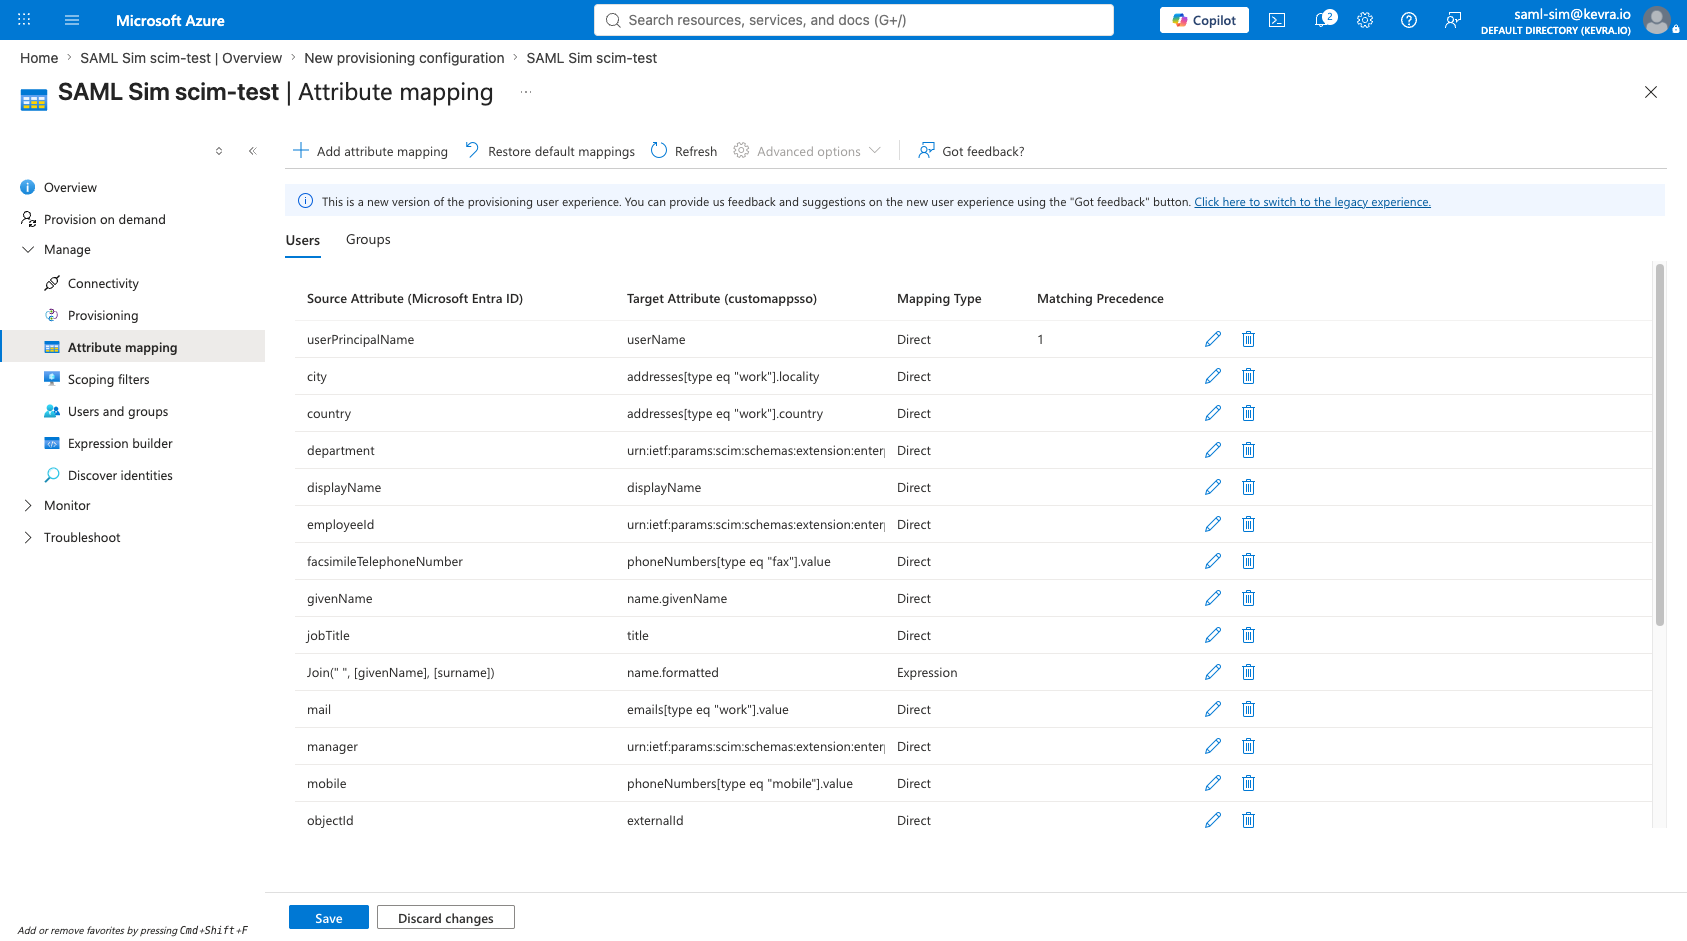
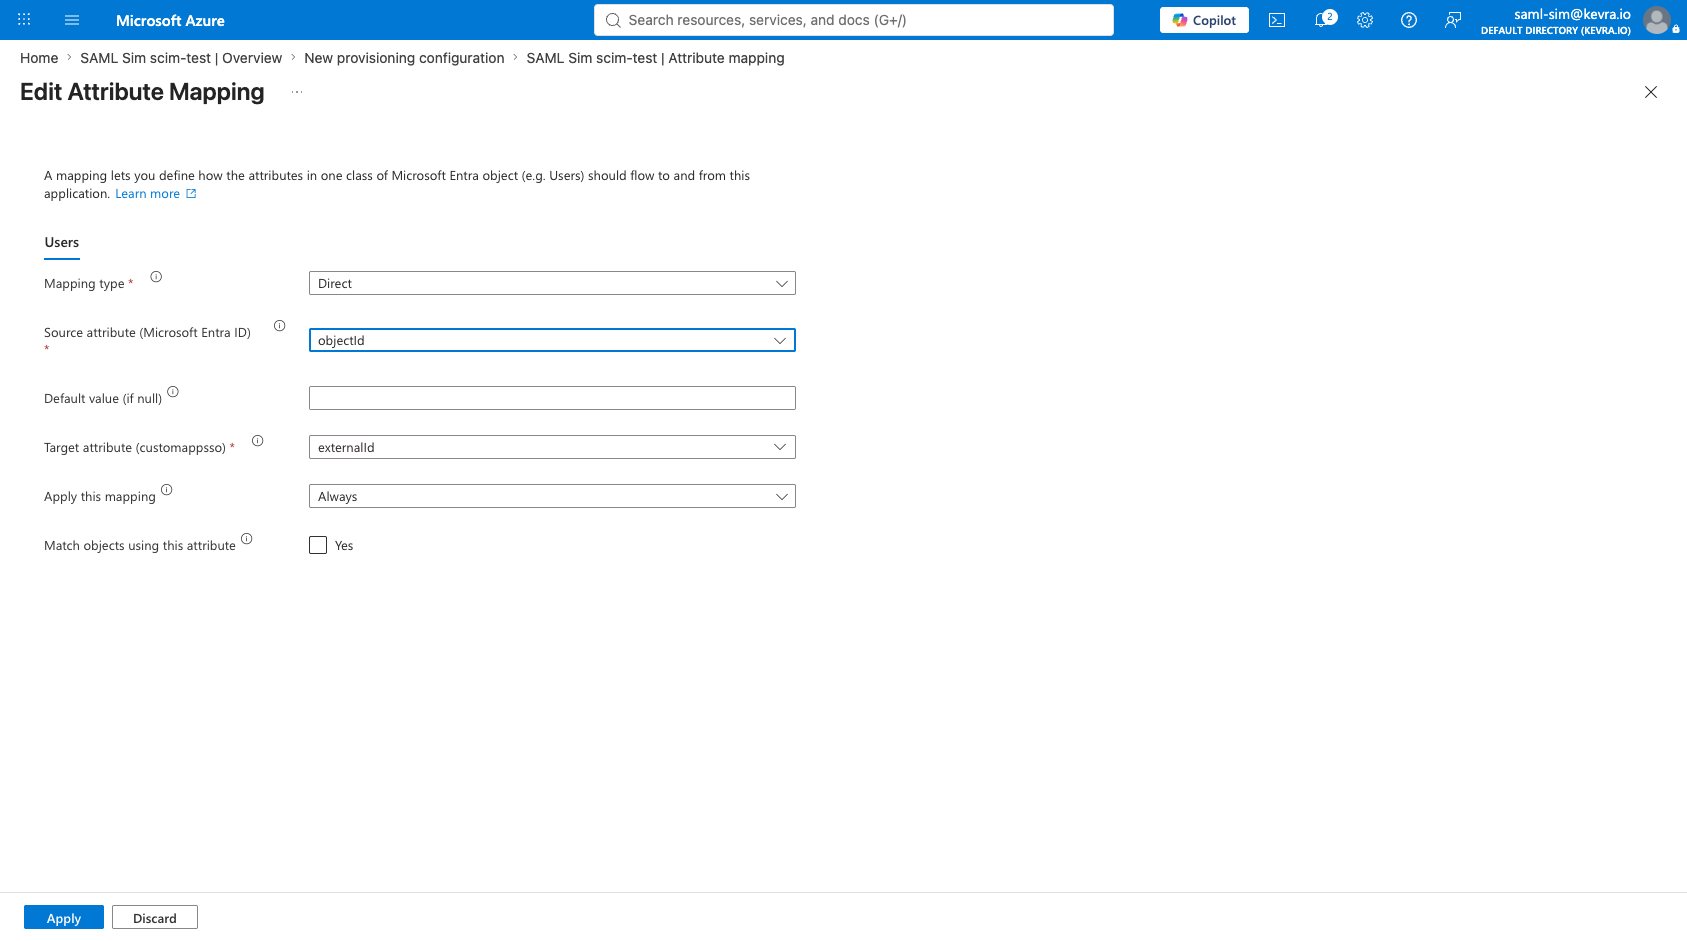
- Under Users and groups, assign whoever should be provisioned. Assigning a group covers its members, so you do not have to assign each person.
- Set Provisioning Status to On and start provisioning. Entra runs its cycle roughly every 40 minutes; per-object results show up under Provisioning > Provisioning logs.
Okta
- In the Okta admin console, go to Applications > Create App Integration and choose SCIM 2.0 Test App (Header Auth), or your own SCIM-capable app integration.
- Set the SCIM connector base URL to the realm endpoint and the unique identifier field to
userName. Enable Push New Users, Push Profile Updates and Push User Deactivation. - In the Authorization header field, enter the literal value
Bearer <token>, prefix included. Okta is the opposite of Entra here: Entra wants the bare token, Okta wants the full header value. - Under Provisioning > To App, enable Create, Update and Deactivate. Assign your users and push.
Watch users appear
On the next cycle, or immediately after a push, the provisioned accounts show up in your realm:
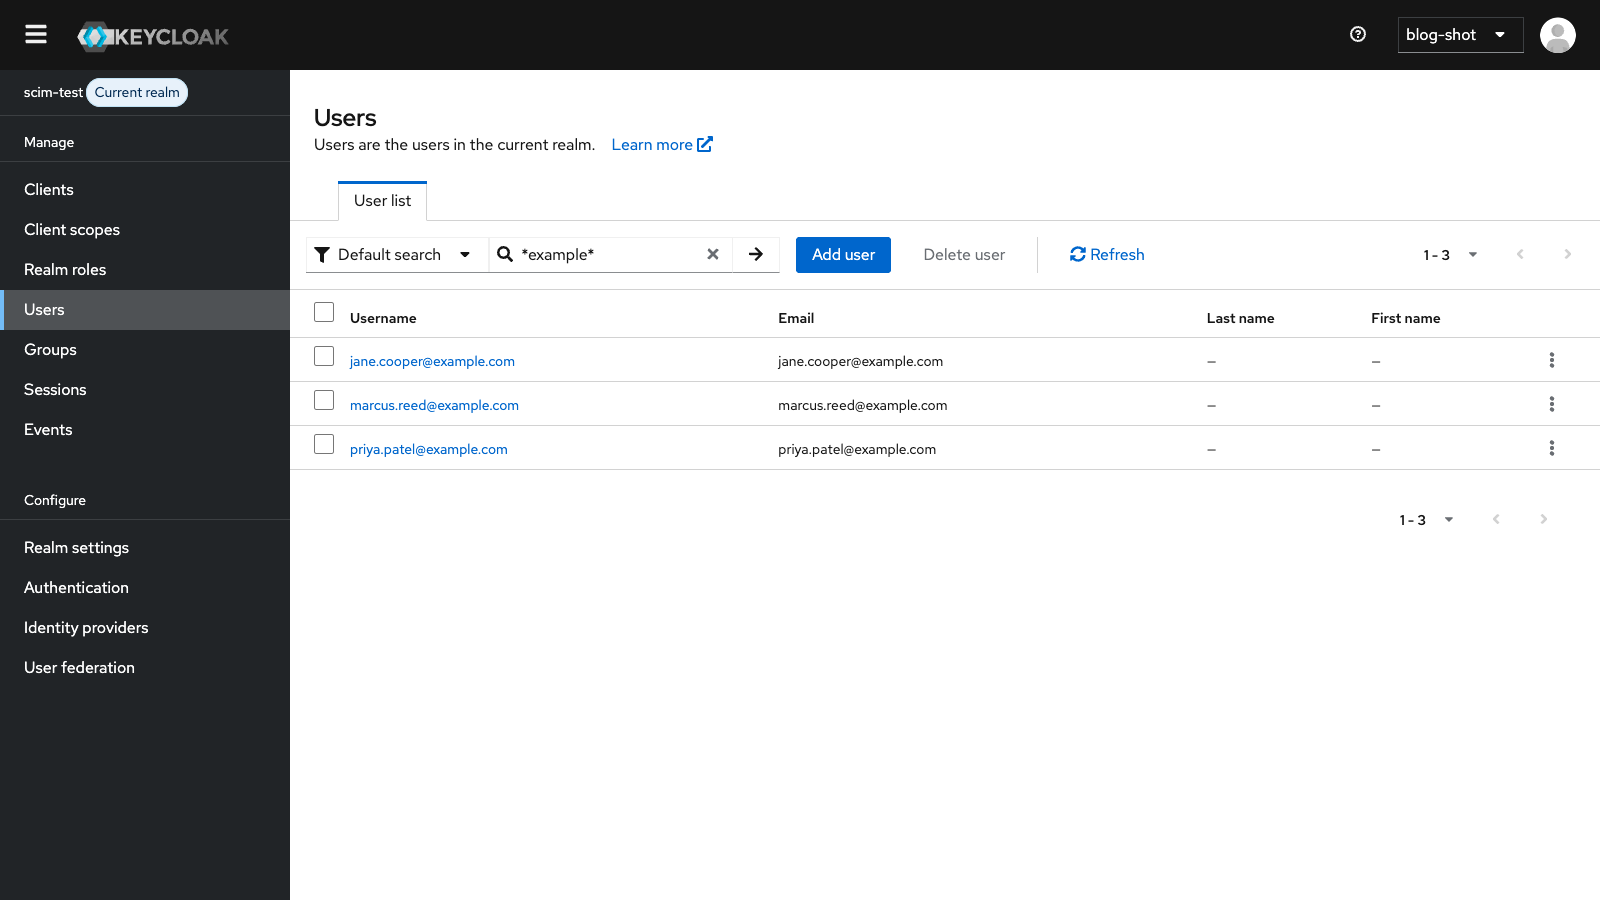
You can see the same thing from the API side:
curl -H "Authorization: Bearer $TOKEN" \
  "https://<your-instance>/realms/<realm>/scim/v2/Users"

{
  "schemas": ["urn:ietf:params:scim:api:messages:2.0:ListResponse"],
  "totalResults": 3,
  "Resources": [
    { "userName": "jane.cooper@example.com", "active": true, ... }
  ]
}
From here the lifecycle runs itself. Profile updates in the IdP propagate to the realm. Deactivating someone in Okta or Entra disables their account in the realm. Groups and their memberships sync as well, from either provider.
Outbound: push identities to your own app
Inbound gets identities into your realm. Outbound is the other half: your realm pushes users and groups onward to your own application, over the same SCIM 2.0 standard.
Your application exposes a SCIM endpoint, and your realm is pointed at it with a bearer token your app expects. From then on, every user and group created or updated in the realm flows out to your app automatically, and a deactivation arrives as active: false. Provision once in your IdP, and the identity travels the whole chain: IdP to realm to application. That is one standard connector instead of sync code you write and maintain yourself.
This matters most for B2B products. If your customers bring their own IdP, inbound SCIM accepts their provisioning; outbound SCIM hands the same identities to your application. Combined with SSO, sign-in lands on exactly the accounts that were provisioned: SAML and OIDC logins resolve to the SCIM-created users, so provisioning and authentication stay one system rather than two you have to reconcile.
Provisioning you can see
Provisioning activity on Kevra Identity realms is monitored. Dashboards track inbound and outbound operations, and alerts fire when something fails, so a broken sync surfaces instead of quietly drifting for weeks. That is the part of provisioning most setups get wrong: not the first sync, but noticing when the hundredth one stops working.
Using it
SCIM 2.0 provisioning is available on Kevra Identity today, with Okta and Microsoft Entra ID supported inbound and any SCIM 2.0 endpoint supported outbound. If you want it enabled on your realm, or you want to talk through your setup first, write to contact@kevra.io or create an account and pick Kevra Identity.